Curious about the history of Pag-uukit? Find out here!
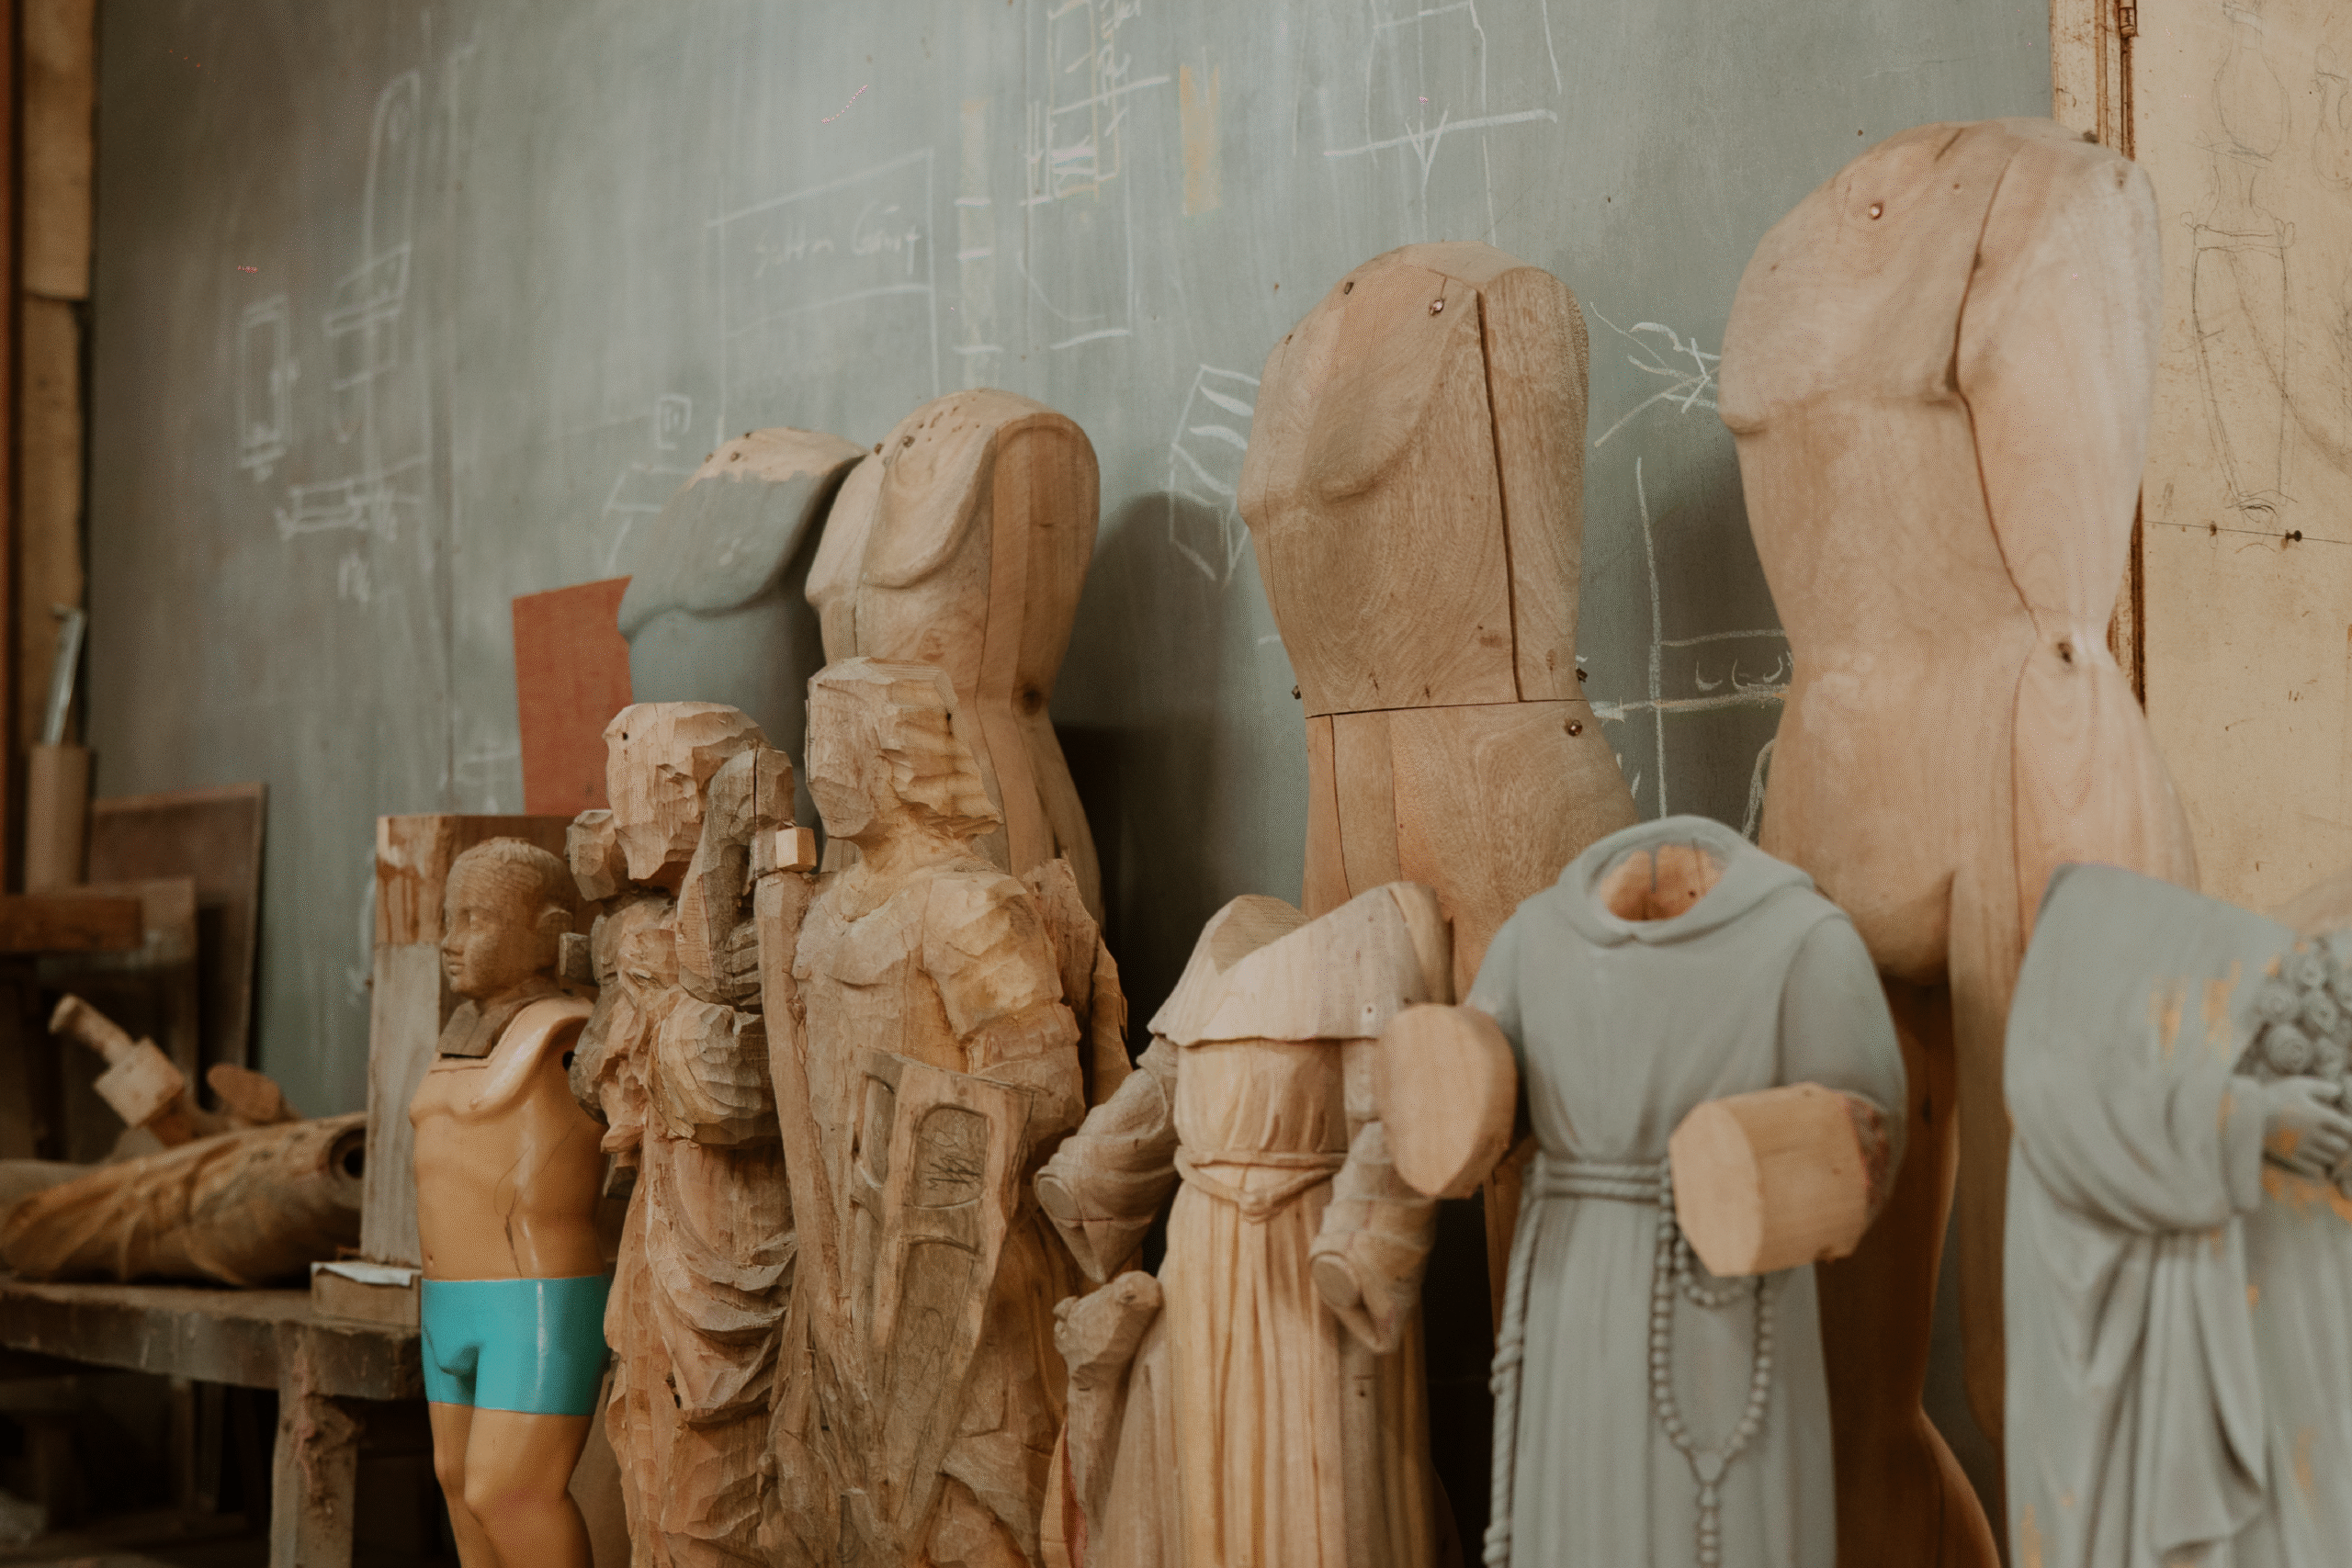
Paete, Laguna is home to highly skilled craftsmen known for transforming simple logs into intricate works of art. This mastery became known a Pag-uukit, making Laguna the Wood Carving Capital of the Philippines.
Woodcarving has been passed down from one generation to another in Laguna. However, today’s artisans face challenges as young Filipinos show declining interest in learning the craft, with many choosing urban careers over traditional artistry.
Despite these challenges, Pag-uukit endures as a powerful symbol of deep-rooted Filipino creativity and cultural identity. This significance drives dedicated efforts by artists and advocates alike to keep the artistry alive and pass the carving tradition to those who will follow.
Our Goal
Reviving a timeless craft for the next generation
Ukit Tayo! was created to preserve and promote pag-uukit in ways that resonate with modern audiences. Our goal is to raise awareness, educate the youth, and provide engaging content that brings appreciation to this traditional art form.
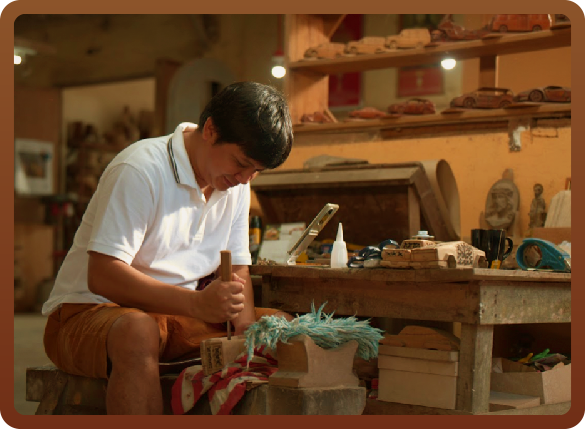
Choosing the right type of wood is essential in making the process efficient. Wood carvers typically look out for pieces of wood that doesn’t have cracks, termites, and isn’t dry.
STEP 2
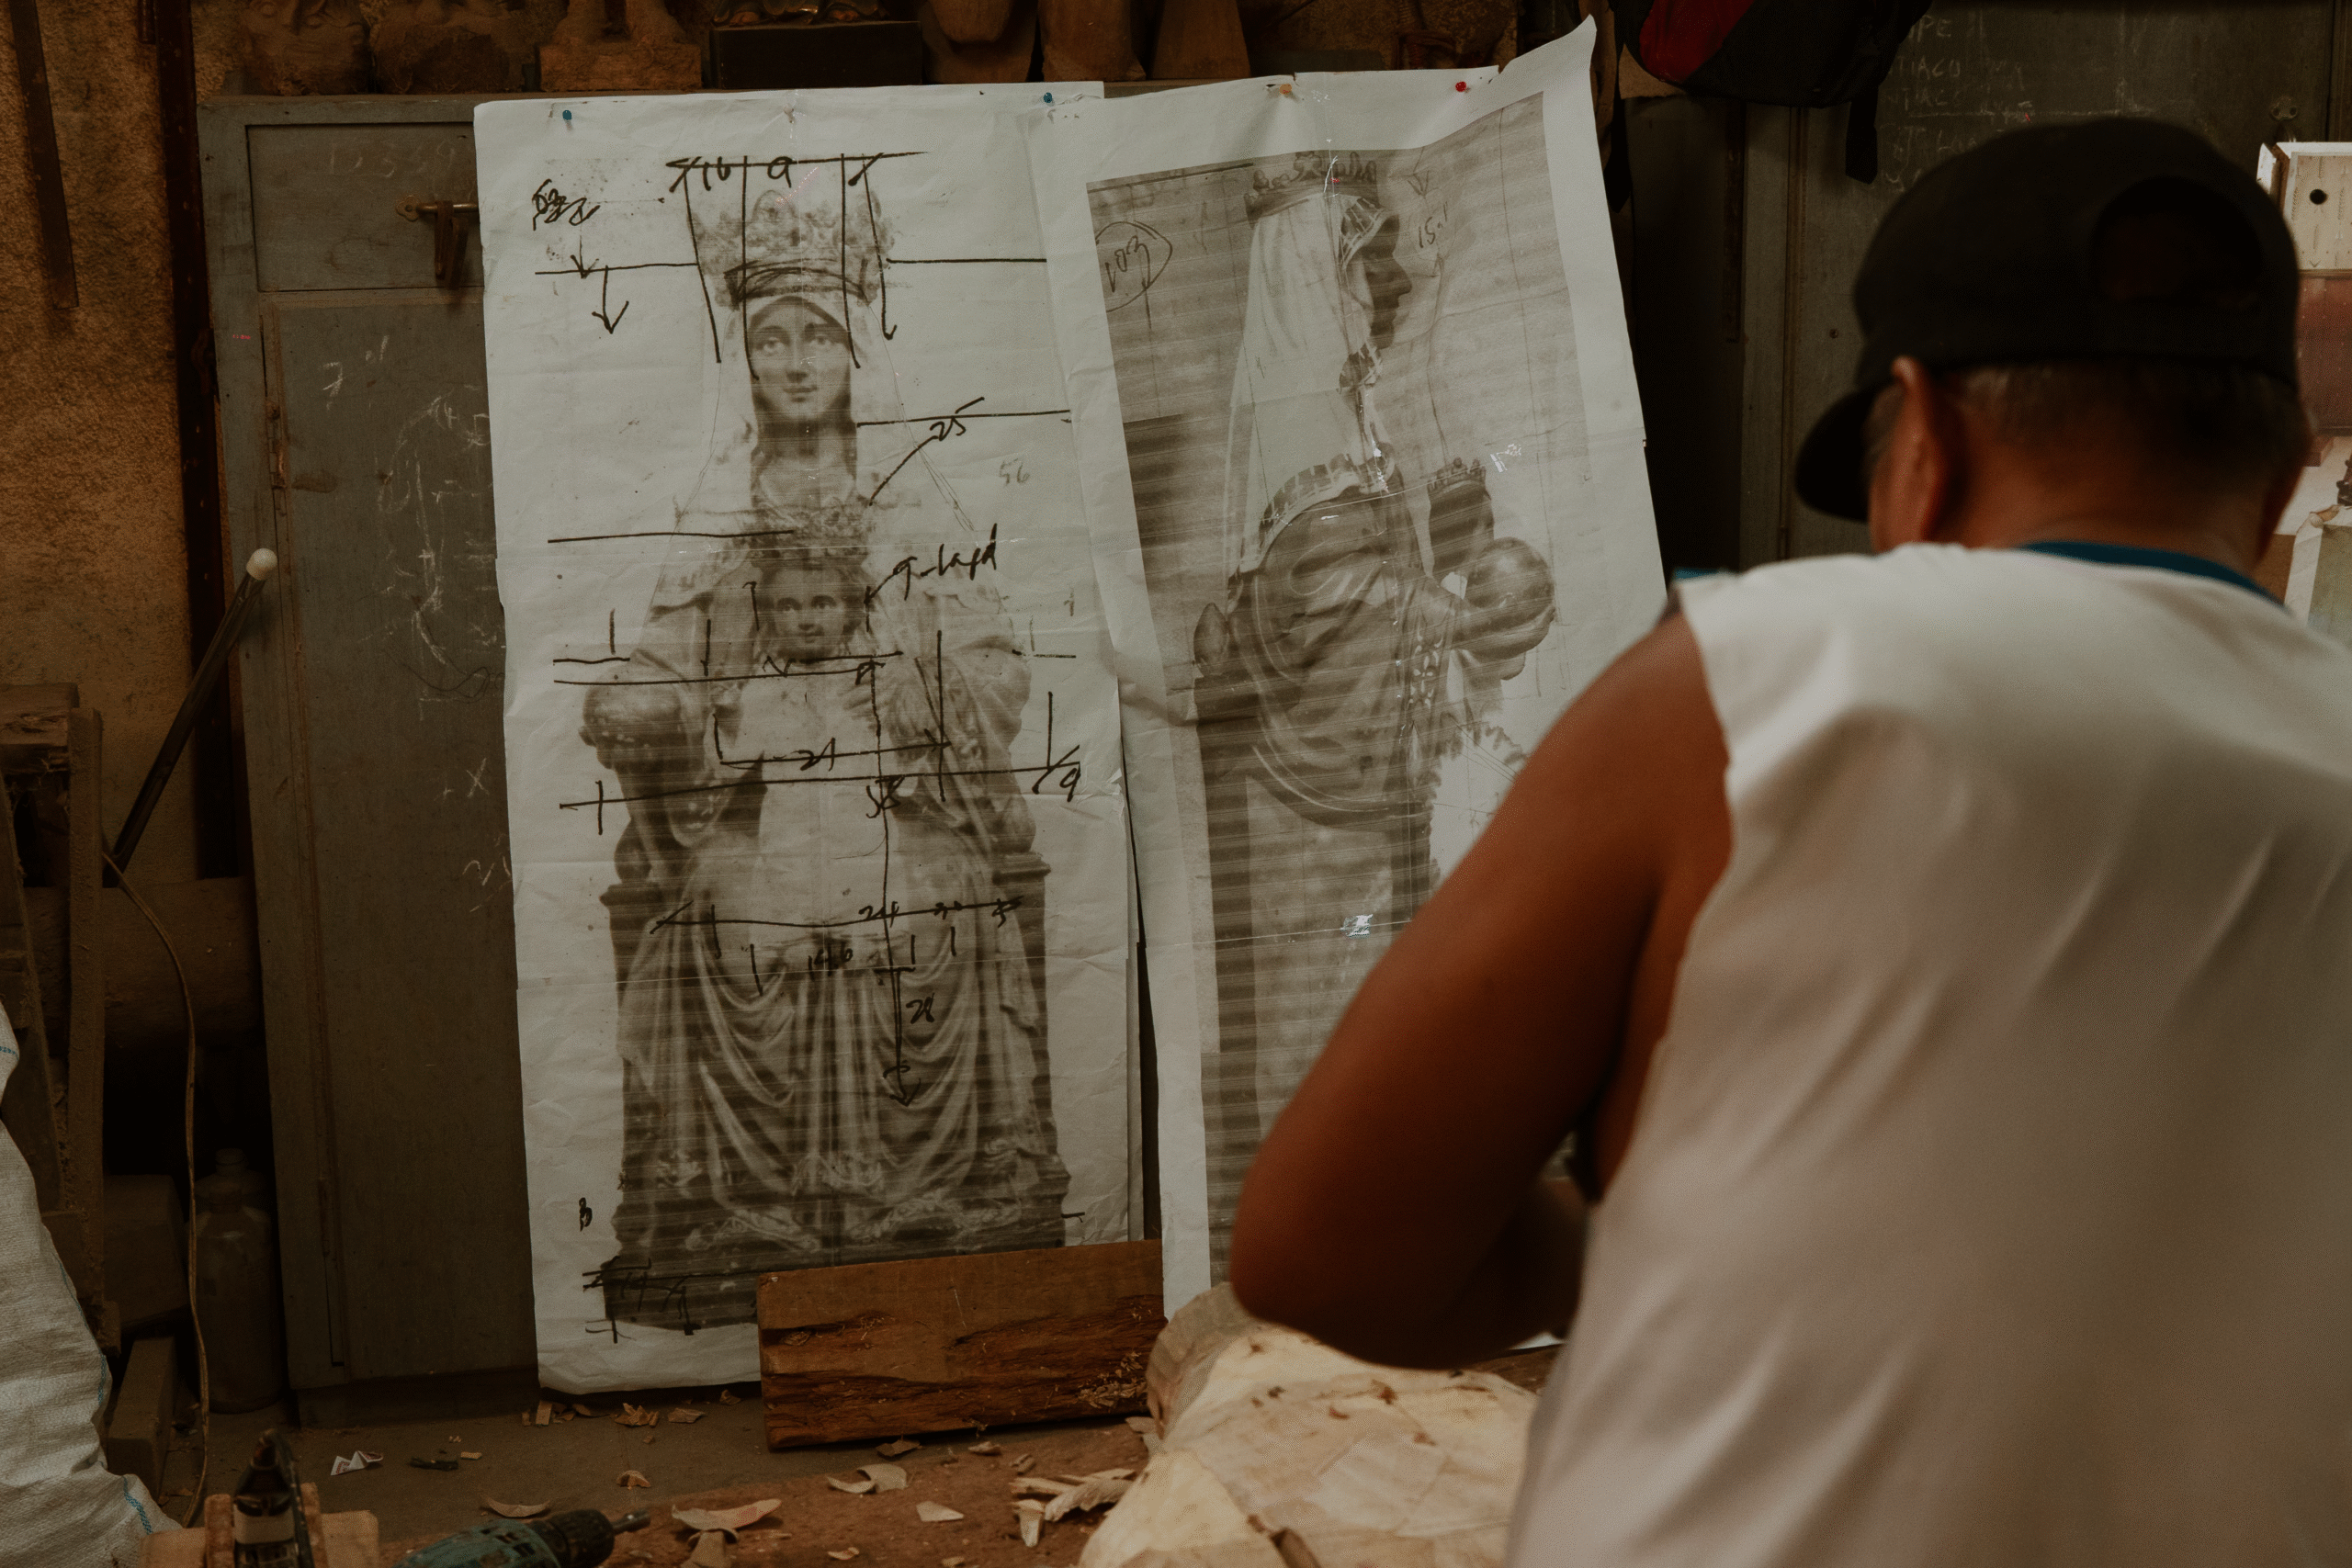
SKETCHING
Once the wood is selected, it is time to get creative. You can either sketch your design on a piece of paper or directly sketch on the wood with the use of charcoal or pencil.
STEP 3
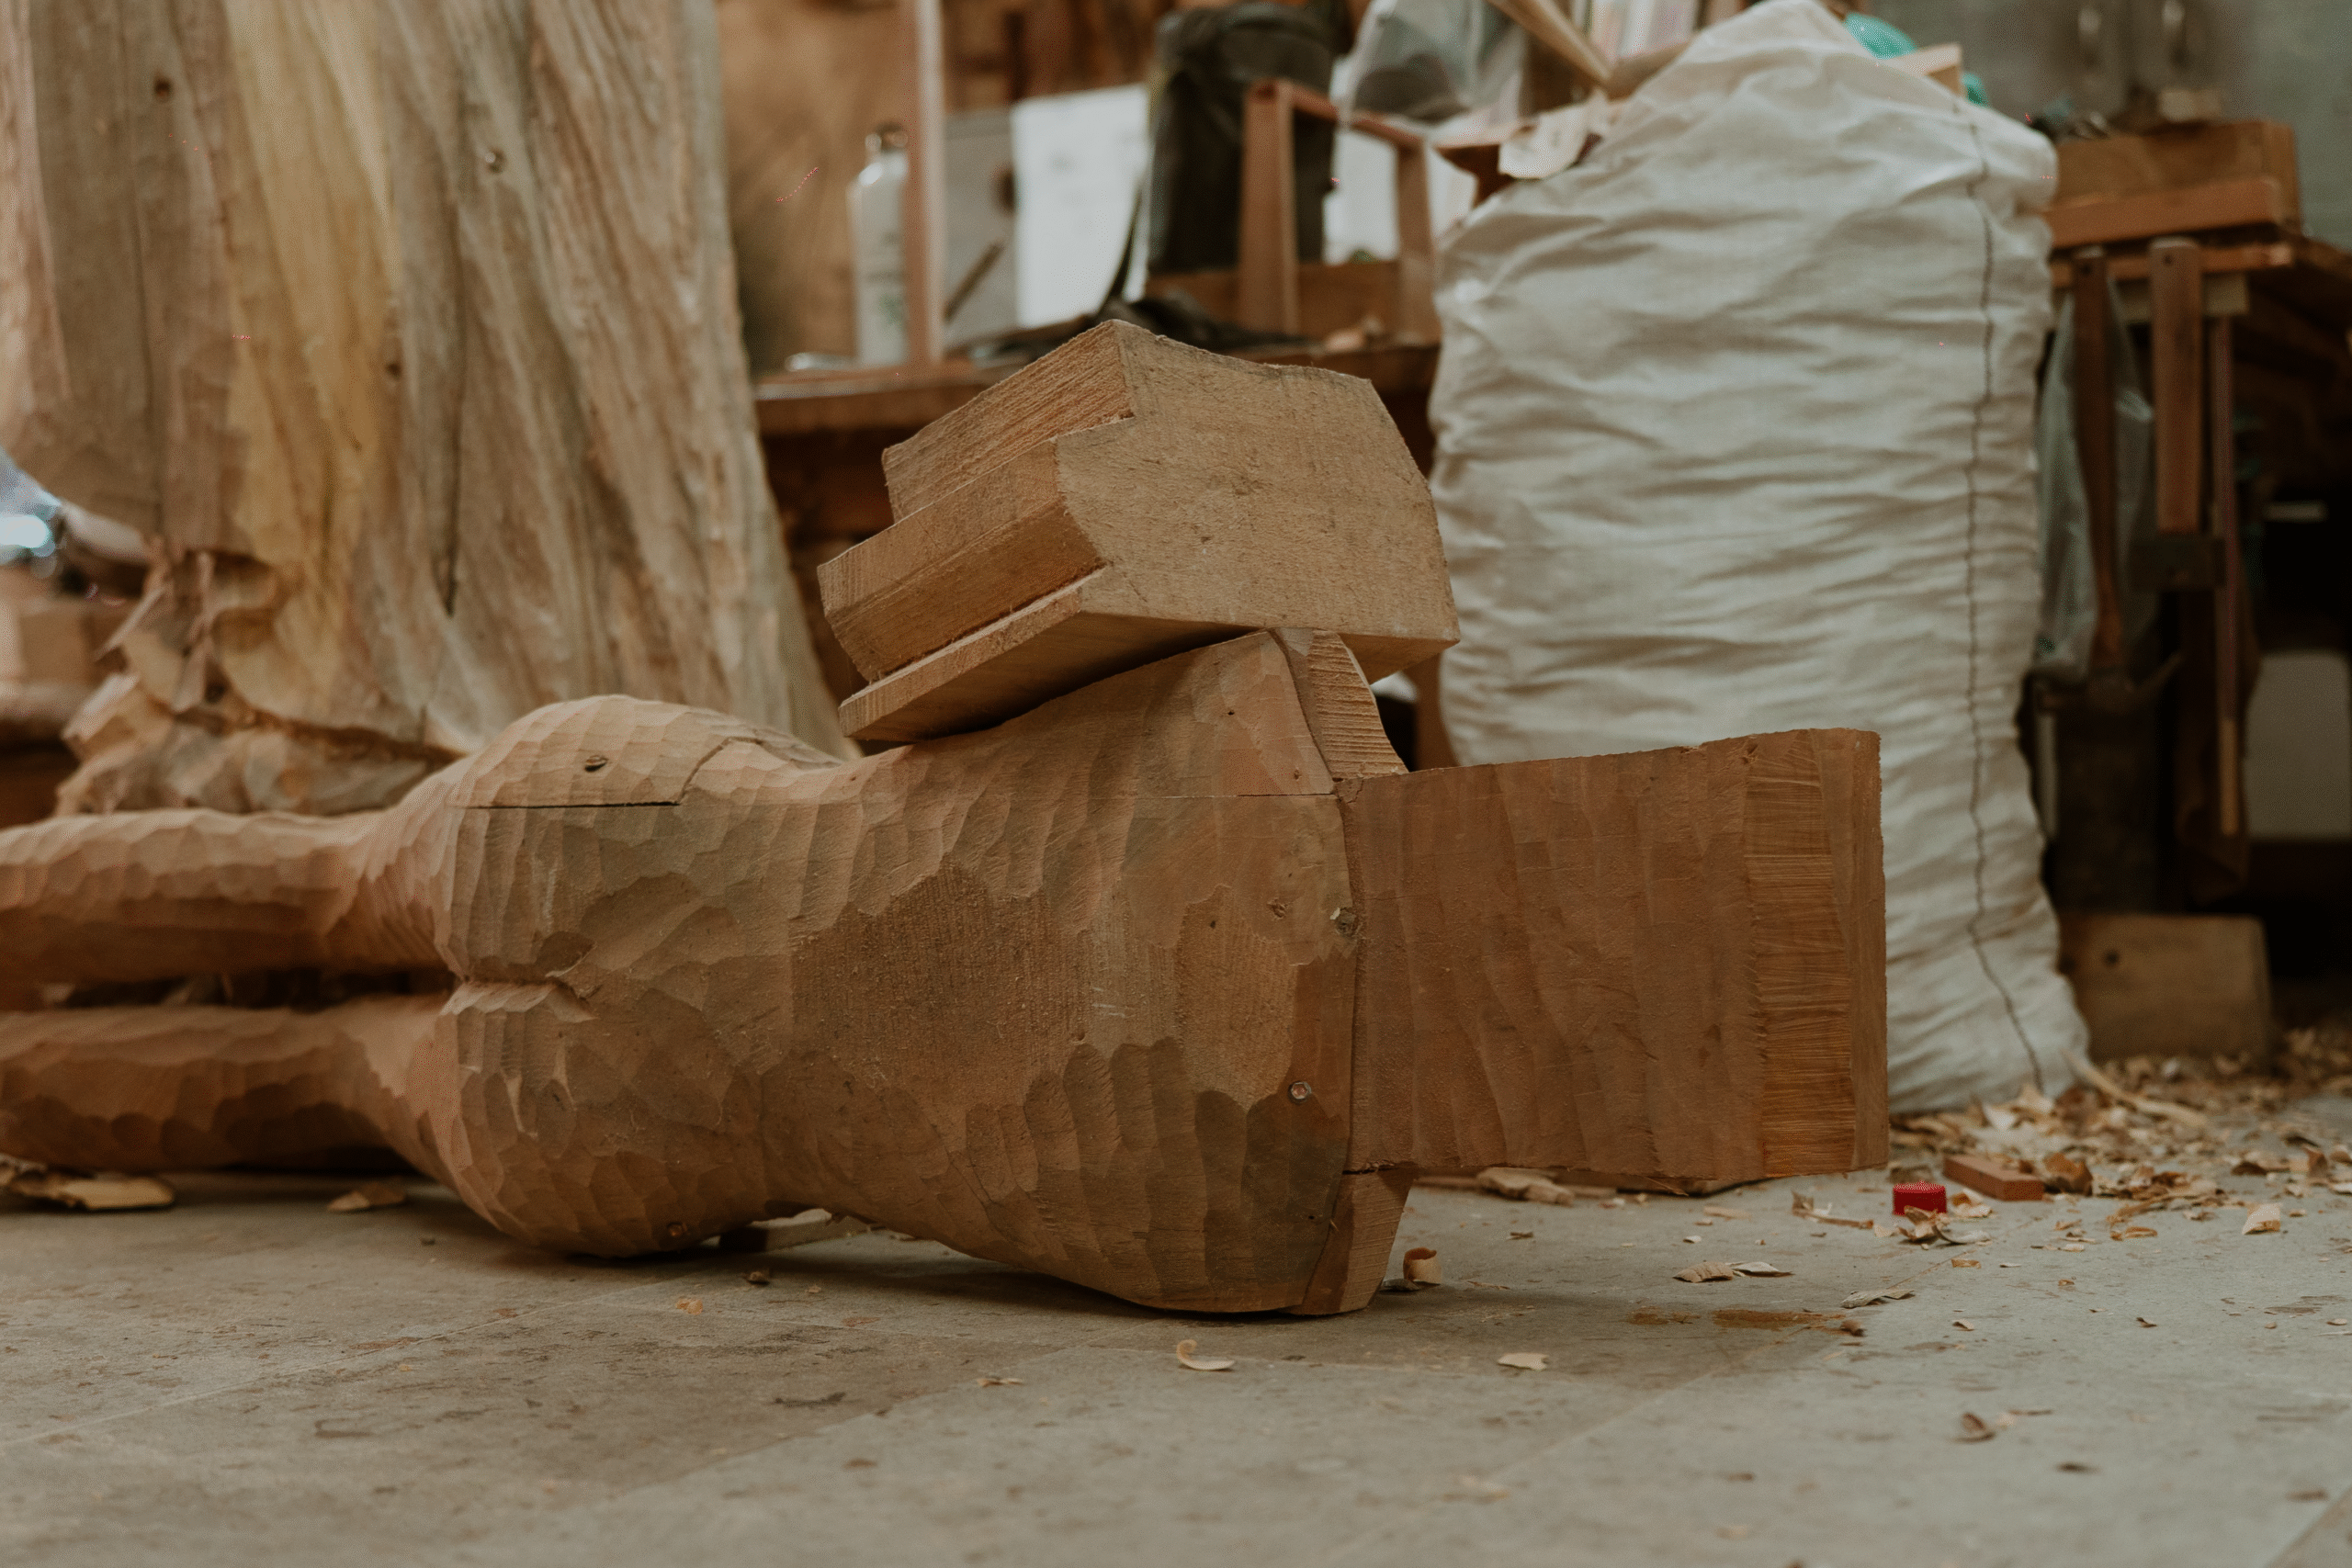
ROUGH CARVING
After finishing your design, start by gradually removing the excess parts of the wood until we achieve the desired shape and form of our work with the use of chisel tools ranging from 25 to 38 millimeters.
STEP 4
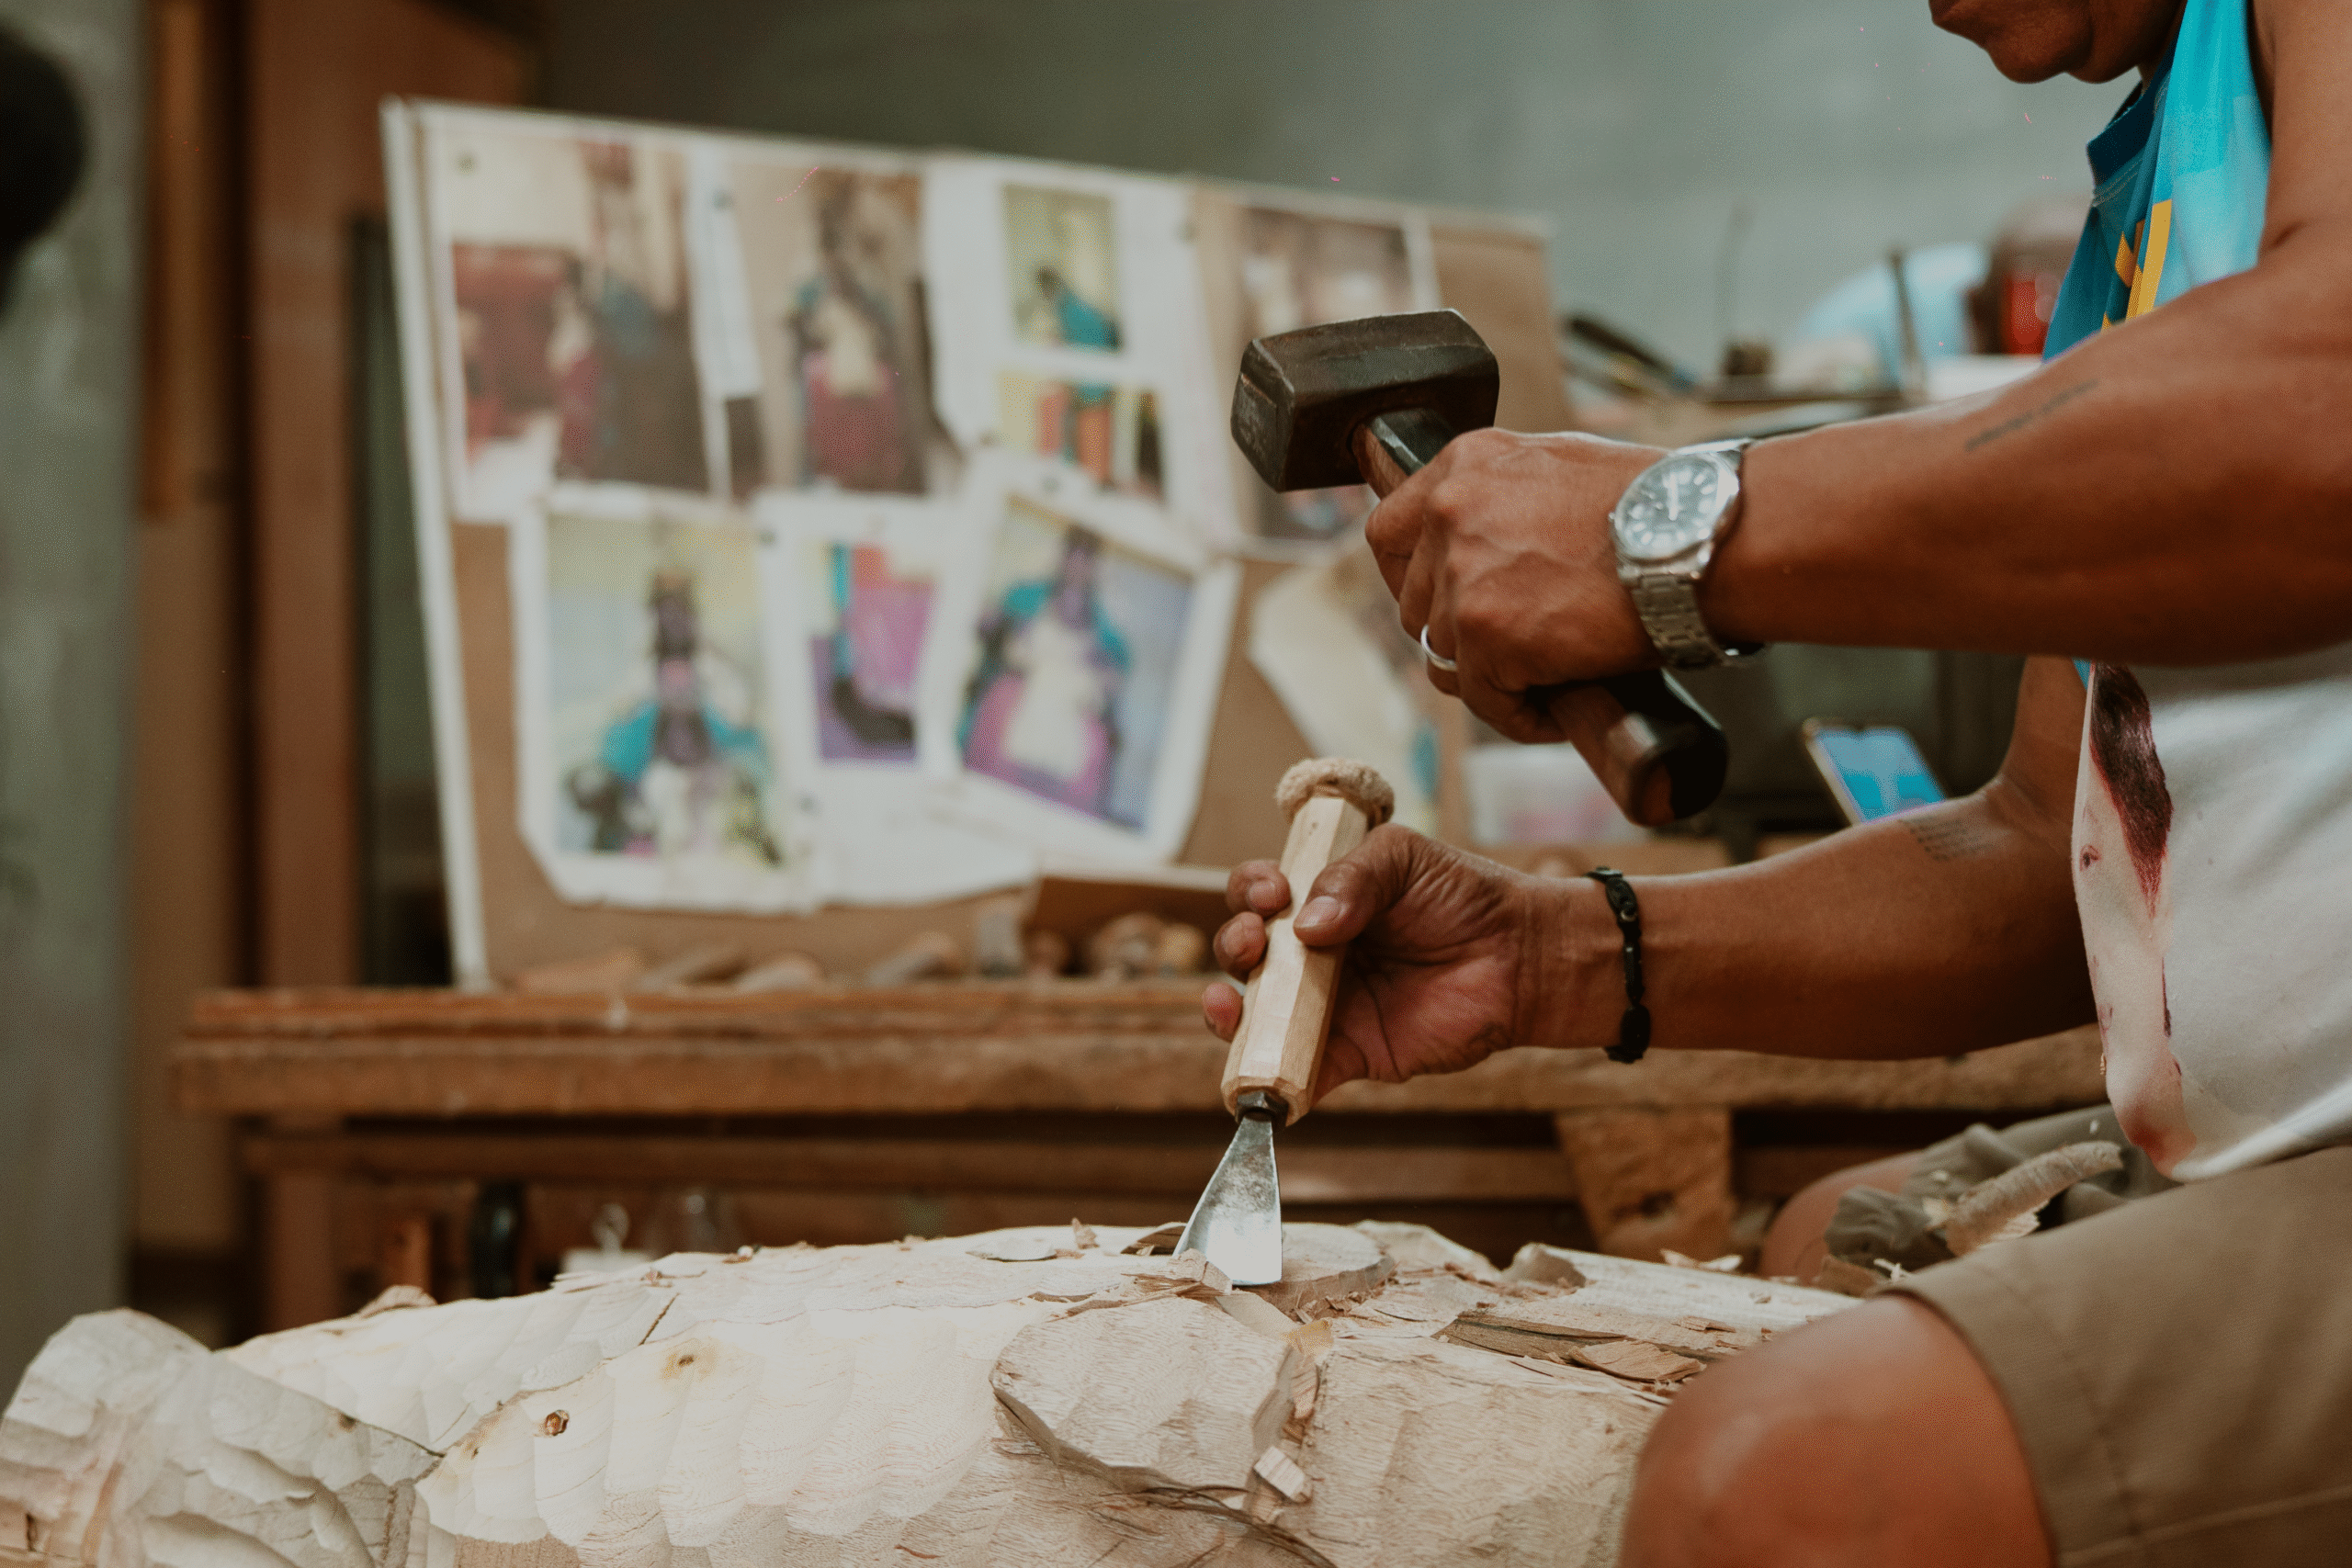
DETAILING & REFINEMENT
Once satisfied with the initial carving, start adding the details such as lines and texture with the use of smaller chisel tools (ranging from 6 to 19 millimeters).
STEP 5
SANDING
After finishing your sculpture, begin by sanding it using sandpaper varying in different grits. It is important to start sanding using the lowest grit then move on to finer grits.
STEP 6
PAINTING/VARNISHING
Lastly, if you prefer keeping it plain, protect your sculpture from getting damaged by sealing it with varnish or add color to it by using water-based paint before sealing it.